How to Make a Kokedama
What is a kokedama anyway?
It’s a form of Japanese art, that as a literal translation, means moss (koke) and ball (dama). Like bonsai, it’s not the actual plant but how the plant is being grown that makes it a kokedama. We decided to make some of these up, presenting the perfect opportunity to share the process with you!
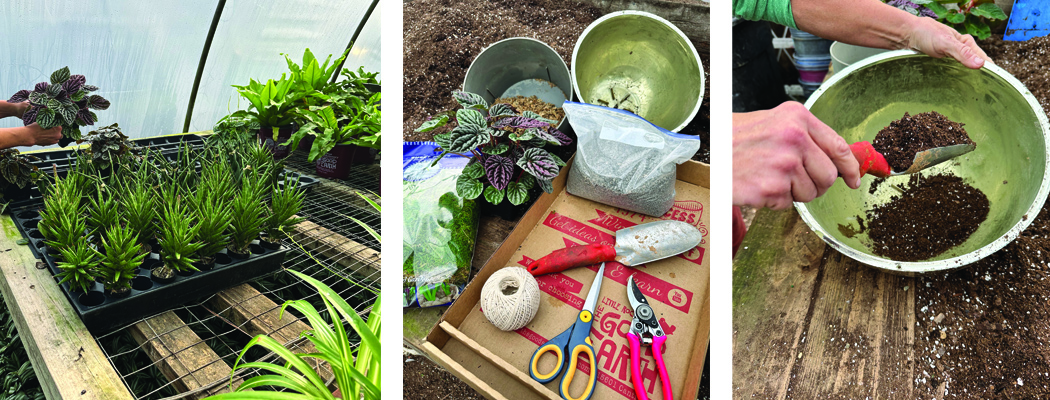
Materials List
First, you need some basic gardening tools such as a trowel, pruners, as well as thick cotton string, twine or fishing line and scissors to cut it. You also need a few bowls; one for mixing the soil in and one for soaking the sheet moss, which will cover the root ball. Oh and water to wet the sheet moss!
Other items you may not have already on hand include:
- Sphagnum moss or peat moss (if long fiber, cut into small pieces)
- Sheet moss
- Cat litter – clay only kind (see below)
- Good Earth brand Professional Potting Mix
- A plant (see below)
A few quick notes on the above ingredients; look for cat litter that is made of just clay, no added ingredients. Fortunately, this is generally the cheapest one in the store, often located on the bottom shelf and may just be available as the store brand only. Use it as it comes, don’t sift out the dust; you need that to help the soil mix ingredients stick together.
We carry long fiber sphagnum moss so that is what we used, just cut it into smaller pieces. If you are able to find short fiber moss, you can use that instead. Remove any sticks or large pieces of debris out of the moss or our potting soil. And about our soil; if you don’t live near us, just make sure you use a premium, soil-less, peat moss based potting mix. Ours has perlite and very fine pine bark in it as well.

Making the Mix
We are going to sneak this in here; before you start the planting mix, start soaking the outer moss in water. We used preserved sheet moss, in a nice dark green color. Try to find large pieces, they will knit together easier and faster than a bunch of small pieces. You can also use long fiber sphagnum moss; use as is, you will want the long strands if using for outer covering; sheet moss, not pieces of moss, because that would be harder to put together.
Now, make the mix! The recipe that worked well for us was two parts (two trowels worth) Good Earth brand Professional Potting Mix, one part long fiber sphagnum moss, cut down into small pieces, and one part cat litter.
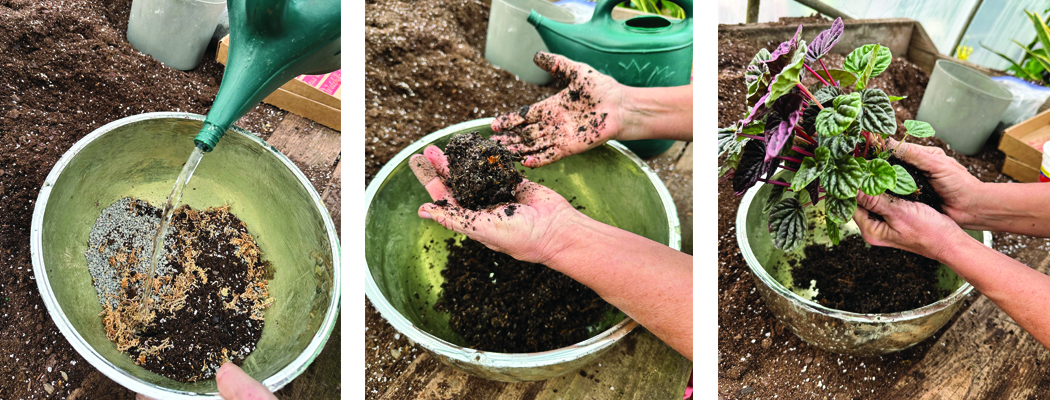
Add Water
Add water a little at a time; you are going for a sticky mix, not muddy. Once you can make a snowball out of it and it stays together, it’s ready.
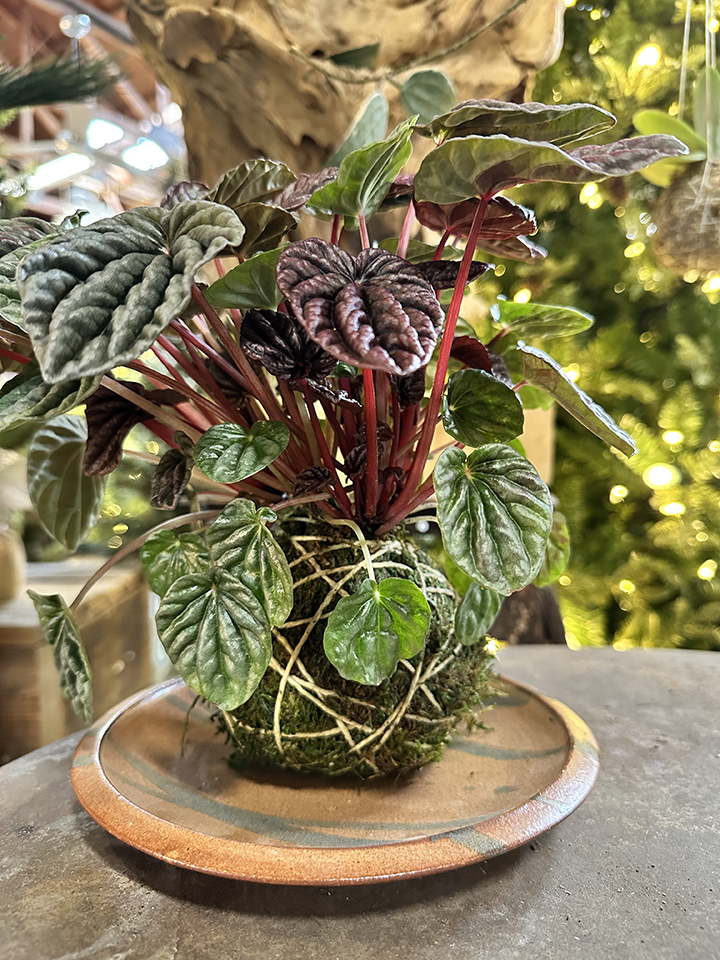
Choosing a Plant
It may go without saying but we are going to say it anyway… choose one you like the form of (such as trailing, upright, sprawling, etc) and one that will work well in the space you want it to live in. Easy care plants would be a good choice, especially for your first kokedama. Our artist chose a pepperomia because it was beautiful and had an array of gorgeous leaf colors. We chose to work with a small plant, one in a 4″ pot, which fit her hand nicely. A larger container plant would mean a large root ball and may be more of a challenge to form. If you can make a stickier potting mix, a larger root ball would be easier to work with. This particular plant is fragile with leaves that can be easily broken, be mindful of that if you choose this plant. Other plants, like pothos, hoya, or airplane plant might be easier. Regardless of the chosen plant, make sure it’s well watered and healthy. As far as watering goes, hydrated plants will have more pliable roots; dry roots can break and become damaged in the loosening process.
Prepare Your Plant
Carefully remove the plant from its container, and gently remove loose potting soil from around the root ball and gently loosen the root ball itself. Carefully shape remaining soil and roots into a ball.
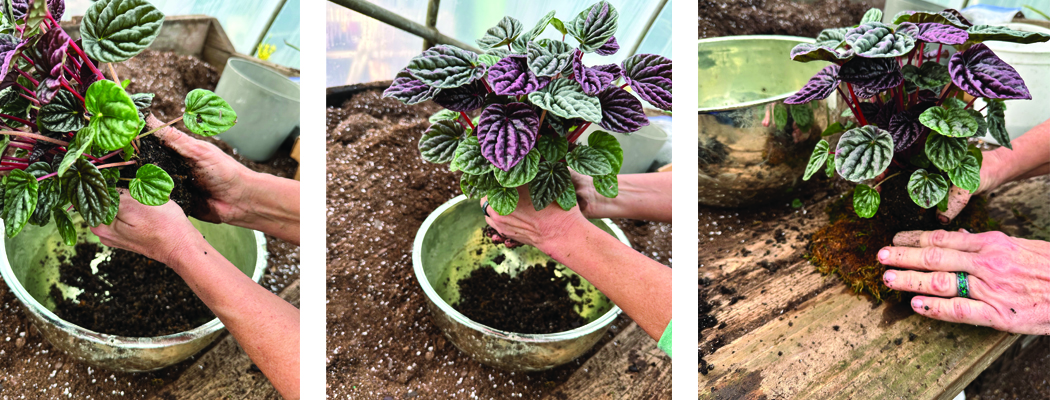
Add Soil Mix to the Root Ball
There might be several ways to do this, but to provide a visual, we formed a hamburger patty shape and size out of the soil mix. We then placed the prepared root ball onto the flattened mix, curved it around the plant roots, then continued to add soil mix around the roots until it was covered well. The finished size of the root ball will depend on the root mass at the beginning of the process. Shape the covered root ball into a sphere that can be set down, intact, without falling apart. Get your string ready; don’t cut any but make sure it is untangled and ready to pull.
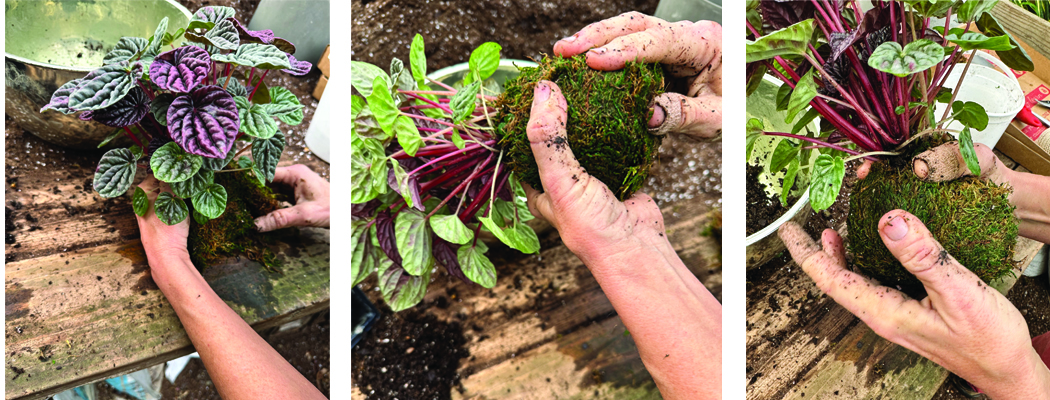
Cover with Moss and Wrap
Start with a good size piece of saturated sheet moss, piece together so there isn’t a lot of overlap from piece to piece and use smaller pieces to plug in between larger pieces. When moss is completely covering the soil, get string, leaving a long end free, maybe 12-18″ so you have enough to join with other end when finished wrapping.
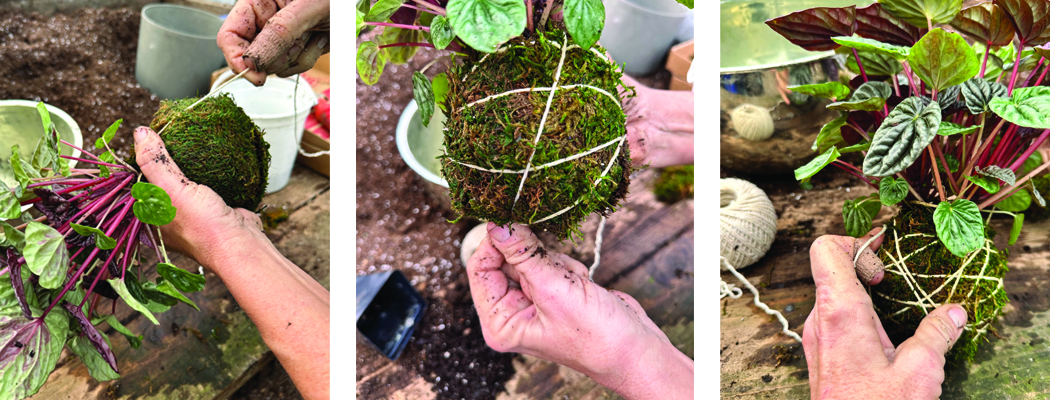
Wind the string around the root ball, wabi sabi (imperfect and random) or in an organized pattern, whichever style you prefer. Just make sure you don’t have any big open areas without string.
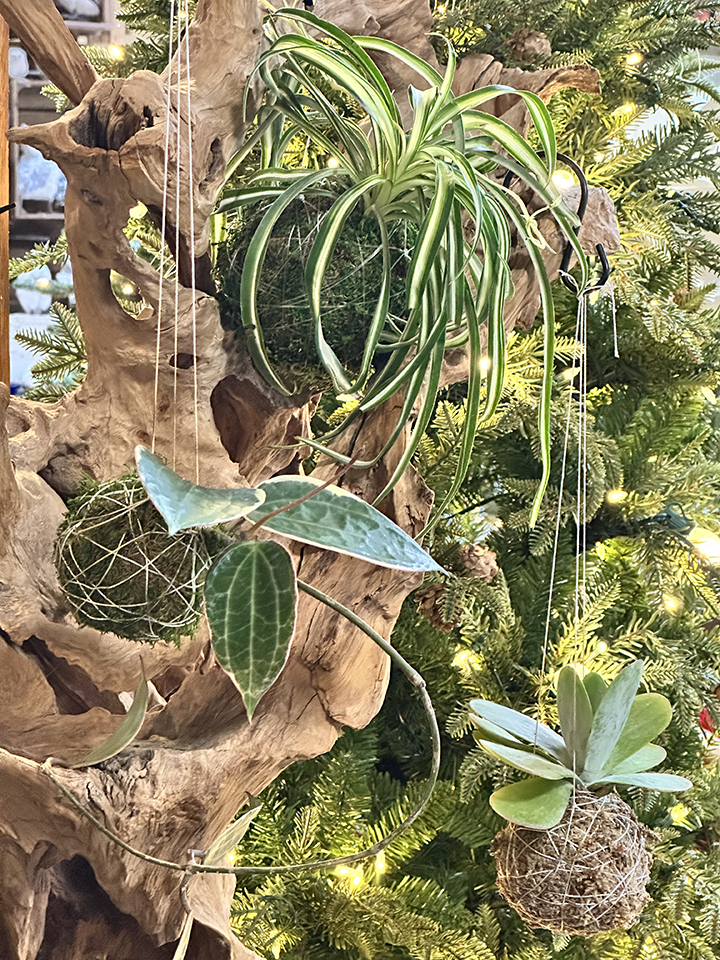
Once you get it all wrapped around, tie the ends together. After this, you can either set it in a little pretty dish, or saucer or plan to hang it. To hang, tie three strings or finishing lines onto it, gather them at the top and tie them together, then hang.
Caring for Your Kokedama
As we talked about above, light is based on the plant and its specific needs. These can be easily hung near a window, just make sure the sun isn’t strong enough to burn the plant. Water by filling a bowl, then placing the kokedama in the water for a few hours, remove and let drain for a few hours before hanging back up or placing back in your saucer. To fertilize, mix the appropriate water soluble fertilizer in with water and let the plant soak it up, as the plant hydrates.
Enjoy your artistry!