How to Plant a B&B Tree or Shrub
Let’s start at the beginning; what is a B&B anyway? When you shop for trees or shrubs, you might have an opportunity to choose between one in a container or a B&B. B&B stands for ball and burlap; this is when a plant has been grown in the ground. Once a field grown plant is ready to sell, it is then dug up and the rootball is wrapped in burlap. For larger trees, sometimes this burlapped rootball is then placed in a metal basket to help support the rootball. Pretty easy to see where these get their name, right?
Balled and Burlap versus Container Plant
Container plants usually weigh less and can be more manageable to transport; the appeal of the B&B is usually value. Typically, you get more plant for your dollar by purchasing a B&B. They are usually heavier, as they have been grown in heavier soils than a container grown plant. Ball and burlap plants can be intimidating for first timers. This blog post is to help familiarize you with B&B plant materials, and the proper planting methods for growing success.
Handle with Care
Because B&B plant materials are often heavier than container plants, plan to have help unloading and getting it to the planting location. Although these plants are just as tough as container grown trees and shrubs, it’s important to load, unload and place the rootball in the planting hole with care to avoid damaging the roots or breaking the rootball. Breaking the rootball may cause a portion of the roots to break away from the upper portion of the tree or shrub. Do not drop a B&B plant; set it down gently, whether into a vehicle or into the planting hole.
Preparing to Plant
Dig a hole twice as wide as the rootball and almost as deep as the rootball. When planting in heavier soils, such as clay, that tends to hold water, it’s important to subtract one inch off the depth. Why is this? Roots need oxygen and heavy soils with poor drainage hold water near roots longer, which reduces oxygen to the roots. If this happens for an extended time, root rot can occur. A plant without healthy roots will decline. Planting a bit high gives the plants’ surface roots more opportunities to take in oxygen from the air. The top of the rootball should be about one inch higher than the surrounding soil surface.
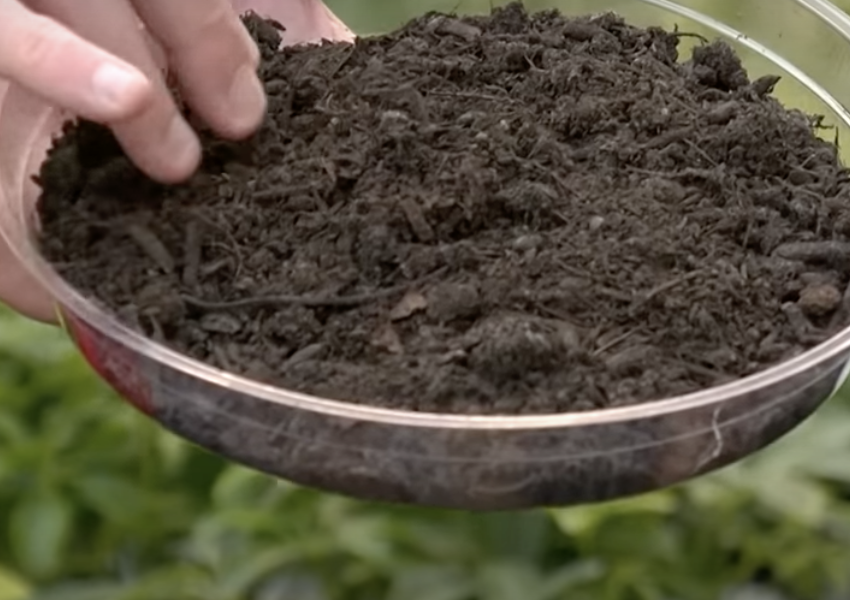
Another way to help plant roots get more oxygen is to add the right kind of organic matter to a heavy soil. A general rule of thumb is to stick to a 70% native soil to 30% amendment ratio. We suggest using our Organic Compost to amend heavy soils; it contains small particles of pine bark, which allows for air pockets in the soil. This will add opportunities for more oxygen in the soil due to better drainage.
For sandy soils that drain too fast, we suggest adding organic matter that has smaller particles that will hold onto water; Cotton Burr Compost would be a good option. Stick with the 70/30 ratio on this as well. Although your native soil may not be great, your goal is for your plant to root out into that soil. If you completely replace the native soil just in the planting hole, the roots will most likely stay in that area to avoid the poorer native soil. Plan to plant about one inch high in these soils, as often times, the soil at the bottom of the planting hole will settle. You never want the top of the rootball to be lower than the surrounding soil.
To get a good feel for how well your soil drains, complete a drainage test. This is discussed in the Getting to Know Your Soil blog post linked below.
Don’t forget to add our Good Earth Jump Start at planting. Here is a whole blog post on the benefits of using Jump Start, but the key item to remember is it helps the plant get established quicker by greatly increasing root volume, which can in turn, helps the plant absorb up to 1,000 times more nutrients and water!
How to Plant B&B Trees and Shrubs
Now that the planting hole is ready, the soil to go back around the rootball has been amended, and Jump Start has been added, it’s time to gently place the plant in the planting hole. Try to keep trunk or upper growth of the plant straight as you add the amended soil around the rootball… wait, how about that burlap and metal basket? When do those get removed? Leave them in place until you get the plant just how you want it. You will want those to still be present if you have to remove the plant and adjust the depth of the planting hole or adjustments are needed to straighten it during the planting process. It’s important to straighten the plant by adjusting the rootball, never push on the trunk or top growth of the plant to straighten; this can break the top growth of the plant away from the rootball. As you add soil, press it gently to remove large air pockets; roots need to be in contact with the soil to avoid drying out. Don’t press too hard, it can compact the soil.
Once most of the soil has been placed around the rootball and you have the plant the way you want it, it’s time to carefully cut the twine holding the burlap in place from around the top of the rootball and trunk of the tree or shrub. Leaving them in place will girdle the plant and cause it to decline as it outgrows the tight twine. Once the twine has been cut away from the top of the rootball, peel back both the twine and the burlap to the outer edges of the rootball top. Don’t attempt to remove the twine from the sides or bottom of the rootball; the roots will grow through them into the soil. The same applies to the wire basket, although if the basket comes up over the top of the rootball, you can gently bend the wire back toward the bottom of the rootball, into the planting hole, to avoid them being visible at the soil surface.
The top of the rootball should be about one inch higher than the surrounding soil. This is true for both container and B&B trees, as well as other plant materials that require good drainage such as azaleas. Add a few inches of mulch to cover the rootball. Avoid placing it against the trunk of the tree or shrub.
Caring for Your New B&B Tree or Shrub
Water the newly planted tree or shrub well and continue as needed through the life of the plant. Each planting location is different, with different soil, each plant has different water needs, and water needs differ from season to season. For these reasons, we cannot definitively give recommendations on how much to water a plant. In general, extra handwatering is needed, even if you have a working sprinkler system that is adequate for your established landscape. More water is needed during the summer months. When planting in summer months, we suggest filling the planting hole halfway (or even entirely) before planting. This will both thoroughly wet the ground around the rootball, decreasing transplant shock, and give you an even better idea of how fast or slow your soil drains.
To understand what is happening in the root system of the plant, we suggest Moisture Meters. These are an inexpensive tool for gauging how much moisture is in the soil. We have a link to further details regarding Moisture Meters below.
Watch your plant for sights of stress such as yellowing leaves, wilted appearance and leaf drop. Take a close look at your plant at least once a week to check for disease or insect issues that may not be apparent from a distance. If any signs of distress are visible, reach out to us by bringing a sample or images of the issue to The Good Earth or emailing us images and details.
The most common culprit of plant decline soon after planting is water; either too much or too little. The signs of both are similar. It’s important to know what kind of soil you have, properly amend before planting, and monitor and adjust watering based on weather, and the needs of your particular plant.
Getting To Know Your Soil
Not all soil is treated equally. In this guide you’ll learn properties to look for in your soil and how to adjust conditions to make them the most suitable for your plants.
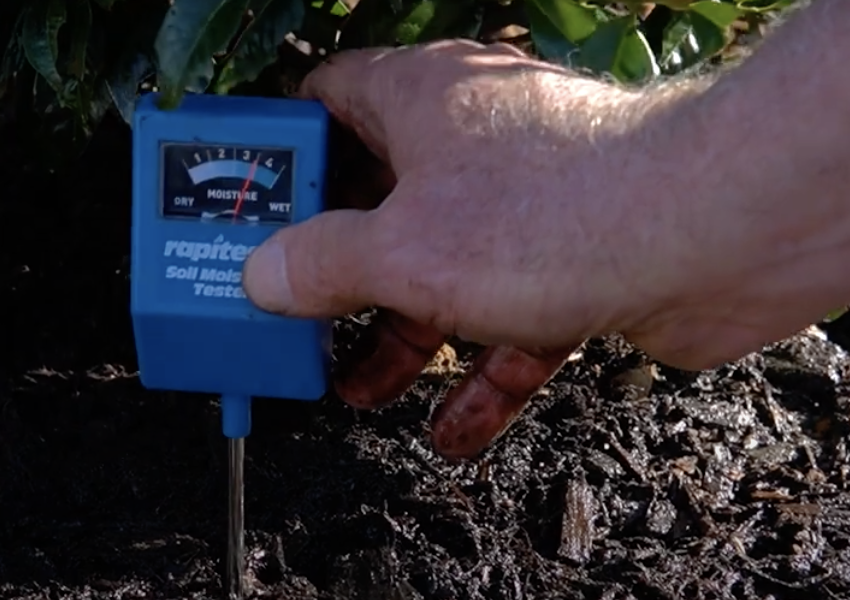
Take The Guesswork Out Of Watering With A Moisture Meter
Watering can be the cause of why your plant isn’t succeeding. Here you’ll learn what a moisture meter is, how to read it, and ways to adjust your watering for best results.