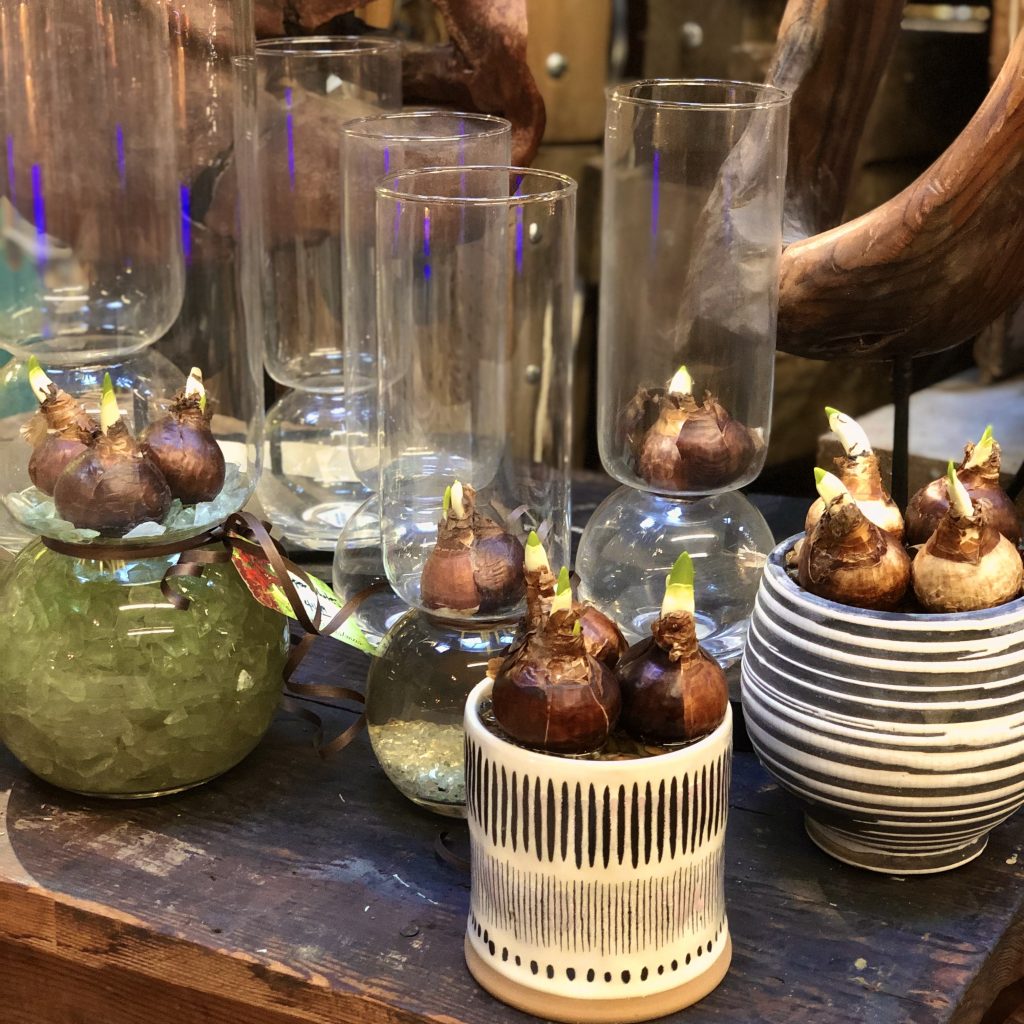
How to Grow Paperwhites
What is a paperwhite?
These are white blooming narcissus plants, often grown from bulbs indoors and used as holiday decor or gifts. The narcissus plant genus includes winter hardy, spring blooming garden favorites daffodils and jonquils as well. Paperwhites are a sub-species of Narcissus tazetta and are not as cold hardy as daffodils and jonquils.
And while we are on the topic, there is difference between daffodils and jonquils, although these terms are often used interchangeably. Jonquils have clusters of flowers on a stem and are more fragrant than daffodils. Jonquils also have slender leaves with rounded tips while daffodils have sword shaped tips.
For several reasons, including the fact that they do not require a chill period to induce blooms, paperwhites can be easily grown easily indoors and forced to bloom. This process is called ‘forcing’ (imagine that!).
With bright white blooms and a nice fragrance, they make great gifts. Add a ribbon around the container, along with a personalized card, and you have created a thoughtful, inspiring gift.
When to plant?
There is mixed info on this. Timing is key and you can find articles (from reputable sources) that tell you to plant anywhere from 2-3 weeks all the way to 10 weeks before desired bloom time. The ideal spot for forcing would be brightly lit and under 60 degrees. That isn’t realistic, though, because most homes are warmer than that! The length of time the bulbs have been stored also matters. Bulbs that have been stored for a few months won’t take as long to force.
We suggest planting 4-6 weeks before desired bloom time. Planting during the first few weeks of November should give you blooms around Christmas. Place in a brightly lit spot indoors, ideally away from air vents.
What do you need?
Paperwhite bulbs
Vase or watertight container
Water
Decorative stones or glass pebbles (optional)
Growing in a Vase
Place the bulb, root side down, in a slender vase or specially designed forcing vase. Add enough water to cover root area of the bulb but do not cover the entire bulb, as doing so can cause it to rot. Make sure the vase always has enough water to cover the root area to encourage rooting. Larger vases can accommodate several bulbs. After rooting occurs, you will begin to see leaves and flower stalks. Choosing a taller vase is often desired; the walls of the vase will support the blooms as they grow, eliminating the need for staking, which is sometimes necessary. The vase method of growing allows you to see the roots as they grow.
Growing in Stone or Glass Pebbles
For decorative purposes, you can also add pebbles of stone or glass to the water areas in your vase. You can also use shallow cache pots (pots without drainage) and fill with gravel or glass, which will help keep the bulbs in place. After filling the container with pebbles, gently place the bottom half the bulbs under the pebble surface. Fill the container with enough water to cover root area of bulb (may take a try or two to get the water level right). Top off with water a few times a week or as needed. To support the flower stems, you might need to stake or tie them together with a decorative ribbon or simple twine.
Growing in Potting Soil
This method is different because you need a container with very good drainage. You can plant a single bulb in a small container or several bulbs in a large one. Use quality potting soil like Good Earth Professional Growing Mix. Tuck the bulbs into the soil, root side down, until only a quarter of the bulb is visible. Water regularly, keeping the soil moist, but allowing it to completely drain. If the container is in a saucer, do not allow any water to sit in the saucer.
Pro Tip
We have mentioned the need to stake or support these pretty often in this post but there is an easy and economical way to keep the plants short and avoid this issue altogether! The secret ingredient is alcohol. Add a bit of alcohol to the water; this will make the water more difficult to absorb, slightly water stressing the plant. The result is shorter leaf and stem growth without a reduction in flower size or longevity.
This method is best used when growing in water, either in a vase or in clear container. Roots are easily visible with these containers and you don’t want to add alcohol water until the roots have begun to grow. At that time, remove the existing water, and replace with alcohol water and use it for all the subsequent waterings.
The goal is a 5% alcohol solution; it’s fine if it’s a bit higher but don’t go over 10% as that can stress the plant too much. (Example math, for an alcohol that is 40%; you would use 1 part alcohol to 7 parts water). Avoid beer, wine or other sugary alcohols.
As always, if you have any questions, please reach out to us! For more Christmas gift ideas for plant lovers, visit this post.
