Potting Up Houseplants
If you’re wondering how to repot houseplants, you’re not alone! Many indoor plants eventually outgrow their containers and begin showing subtle signs that they need more space. Knowing when and how to repot houseplants properly can prevent root stress, improve growth, and extend the life of your plant.
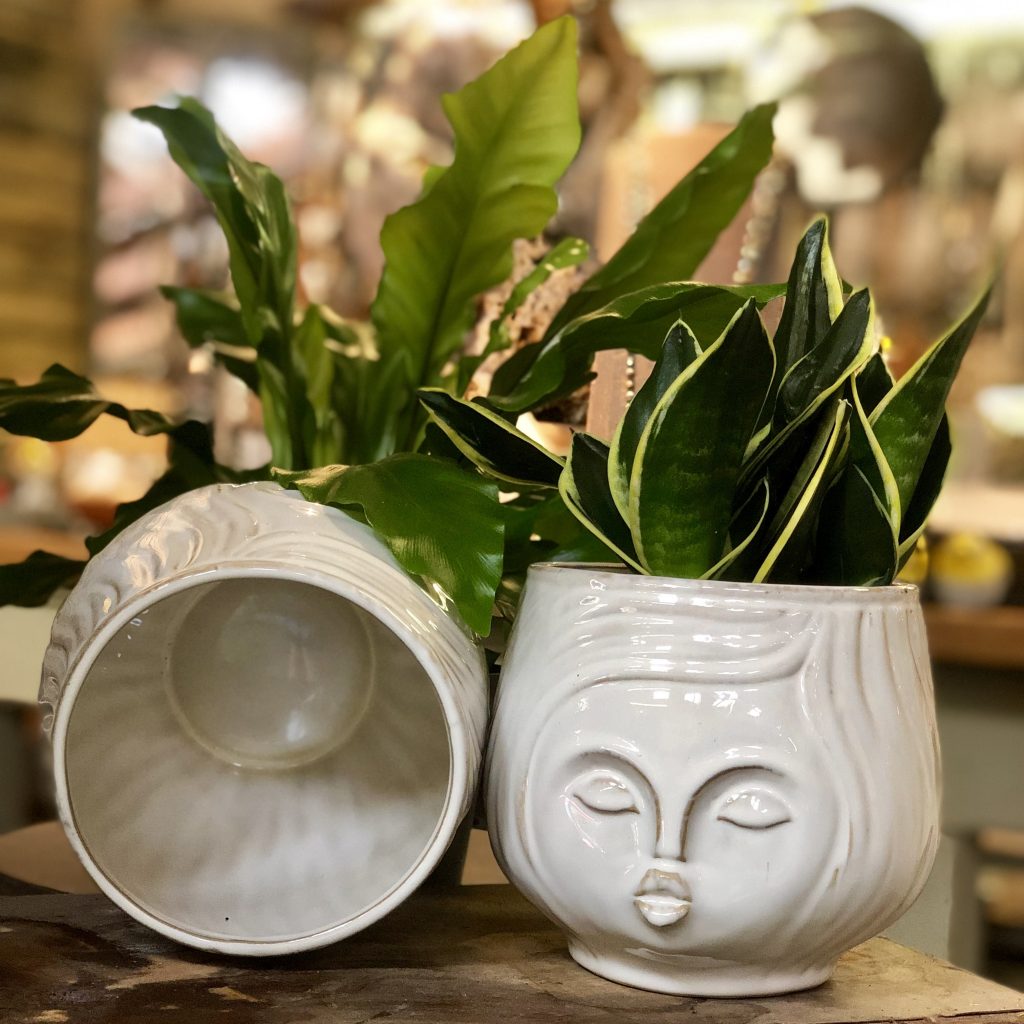
Most houseplants are in nondescript grower pots when purchased. Nothing wrong with that, per se… but given the huge selection of stylish pots available; we suggest upgrading! Keep reading for tips on properly potting up houseplants.
Why Potting and Repotting Houseplants is Important
So far this week, we have talked about watering and feeding houseplants. Those posts referenced other houseplant growing tips on our blog. Armed with all this helpful information, we know you are going to be successful growing houseplants. And with that success, comes bigger, happier plants! And those plants are eventually going to need to be potted up into larger planters so the roots can continue to grow. Plus, part of the joy of adopting a houseplant is giving it a fun container that compliments both the plant and your space. We thought a post about potting and repotting houseplants was in order!
What Does ‘Pot Bound’ Mean?
Some plants respond well to being pot bound. Pot bound is the state in which plant roots have filled most of the container they are in and begin circling the outer edges of soil space, and are unable to further expand.
Some houseplants, such as Peace Lilies, Philodendrons and Cast Iron Plants, actually do better, as in bloom more or grow better, when they are pot bound. When they are repotted into a larger container, the plant switches focus from bloom production to root and leaf production. Eventually, all houseplants, including these, will need to be repotted as they outgrow the container they are in. Just keep in mind that plants which enjoy being pot bound will go through a transition period.
Other plants show stress symptoms, such as yellow leaves and loss of vigor when they are pot bound. Examples of plants that don’t enjoy being pot bound are Chinese Evergreen, Ficus, and Ferns. In addition to checking for insects and watering stress when houseplants look a bit off, gently pull the plant out of the container and see if it is pot bound.
When you can’t seem to keep a houseplant watered, water just runs out of the drainage hole without being absorbed, the plant could be pot bound. In this situation, the roots have taken over the container and there isn’t enough soil to hold water for the roots.
Choosing a Container Size
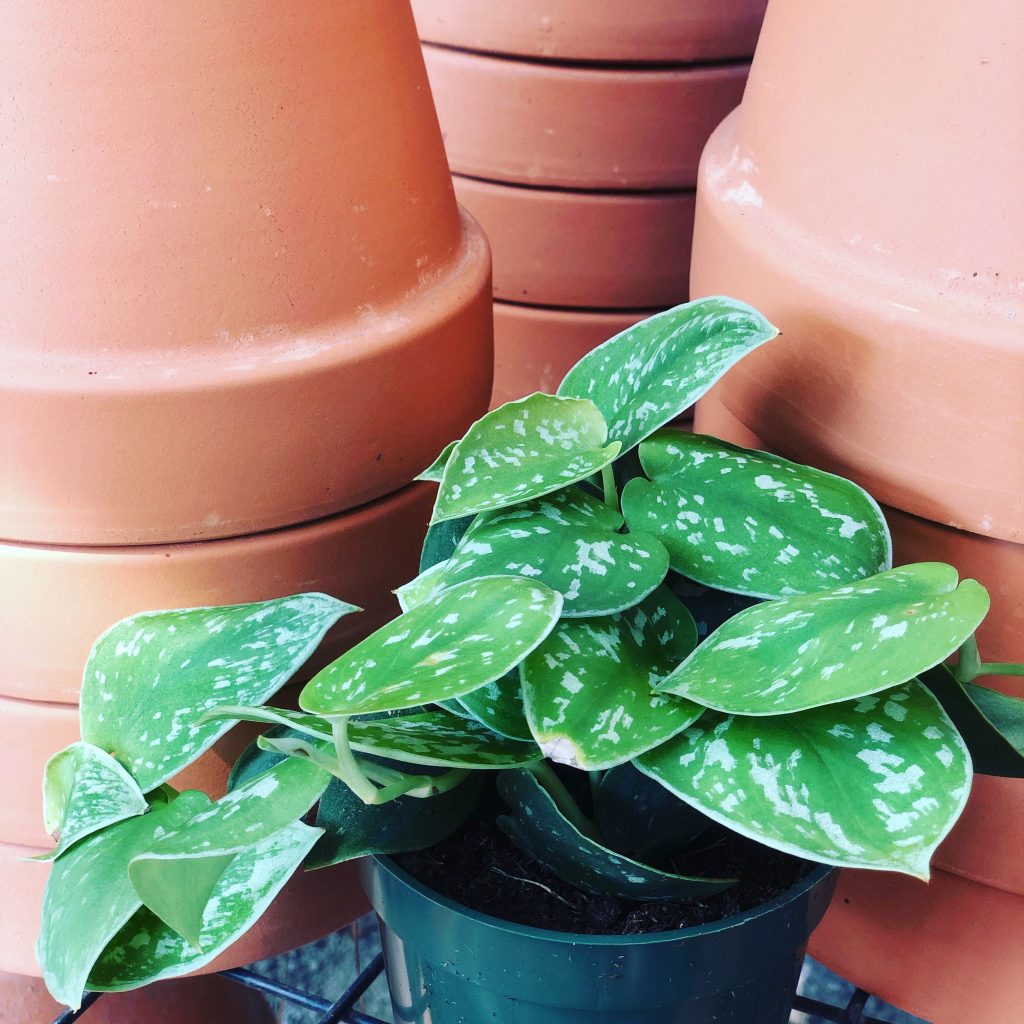
Start by considering the size of the existing container. Most of our houseplants are individually tagged and this tag lists what the plant is and the size container it is presently in; such as 4″ Silver Satin Pothos (pictured above; isn’t she pretty?). Exceptions include plants that come in an assortment or the hundreds of little terrarium plants. If you come across a houseplant you like but the plant name isn’t on the tag, just ask us, we can give you all the details.
Back to that size listed on the tag; the container size. For houseplants and tropicals, they are almost always in even numbered pot sizes, such as 2, 4, 6, 8 inch and so on. This is the width of the present container. This is helpful to know when you are choosing your pot because in general, you only want to go up two inches in container size at a time.
Here’s why; when a tiny little 2″ succulent gets planted into a 8″ pot, the roots are suddenly surrounded by a lot more soil. This soil can hold a lot more water. The tiny plant roots can only absorb a small amount of water and the rest of the water just hangs out in the soil. The extra water near the roots keeps the roots from getting the oxygen they need… and this is how root rot sets in.
More Container Size Tips
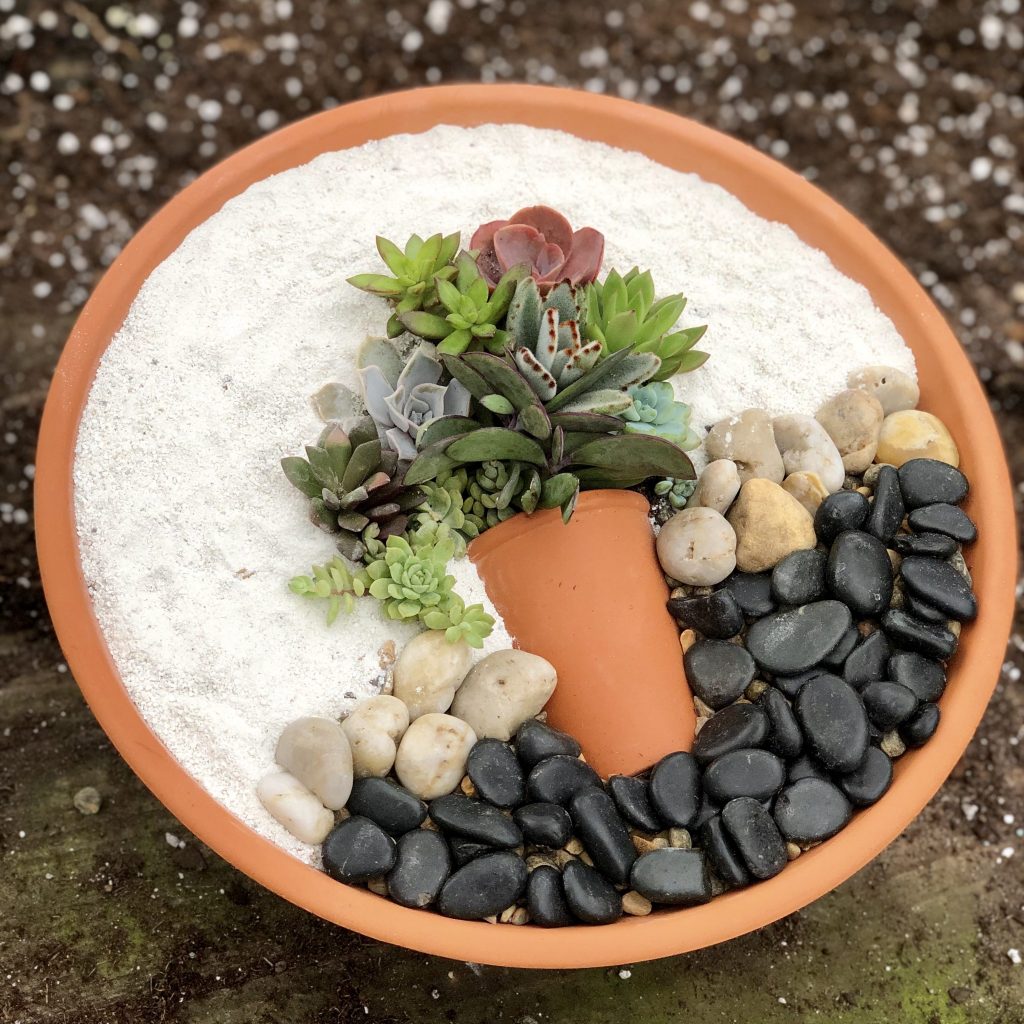
This is a general rule of thumb and just like with all general rules thumbs, there are exceptions. For example, a wide, shallow planter typically called a low bowl, works well for many little succulents planted together. The shallow nature of the pot means that volume of soil that can hold water is much less. In the low bowl planter shown above, you would just water close to where the succulents are planted and not all over the surrounding soil. Established houseplants in larger pots, such as 12″ or so, can be bumped up in pot size by four inches at a time, so long as the roots are well established, and the new container has very good drainage.
Choosing a Container
You found the perfect pot and it’s the right size! Now what? Check for a drainage hole. This is the hole in the bottom of the container that allows excess water to be released. Pots with drainage holes can be directly potted into. Pots without a drainage hole are called cachepots. These are decorative cover pots for indoor plants; avoid planting directly in these. We have a picture of one of our favorite cachepots below; and just look at how adorable that Birds Nest Sansevieria looks in it!
Don’t turn away from a wonderful cachepot, just be aware that there is an extra step in your watering. This sansevieria is still in the green grower pot it came in and that pot is being covered by the cachepot. To water, just remove the plant, water it in a sink or place it can drain. Let it drain well and then replace it into the cachepot.
One of the best features of a cachepot is the versatility of where they can be used. Because they don’t release water, they can be placed on water sensitive surfaces such as wood. Just make sure the cachepot isn’t a porous one; those can release a bit of moisture. But a ceramic one like this will be just fine!
How to Pot and Repot Houseplants
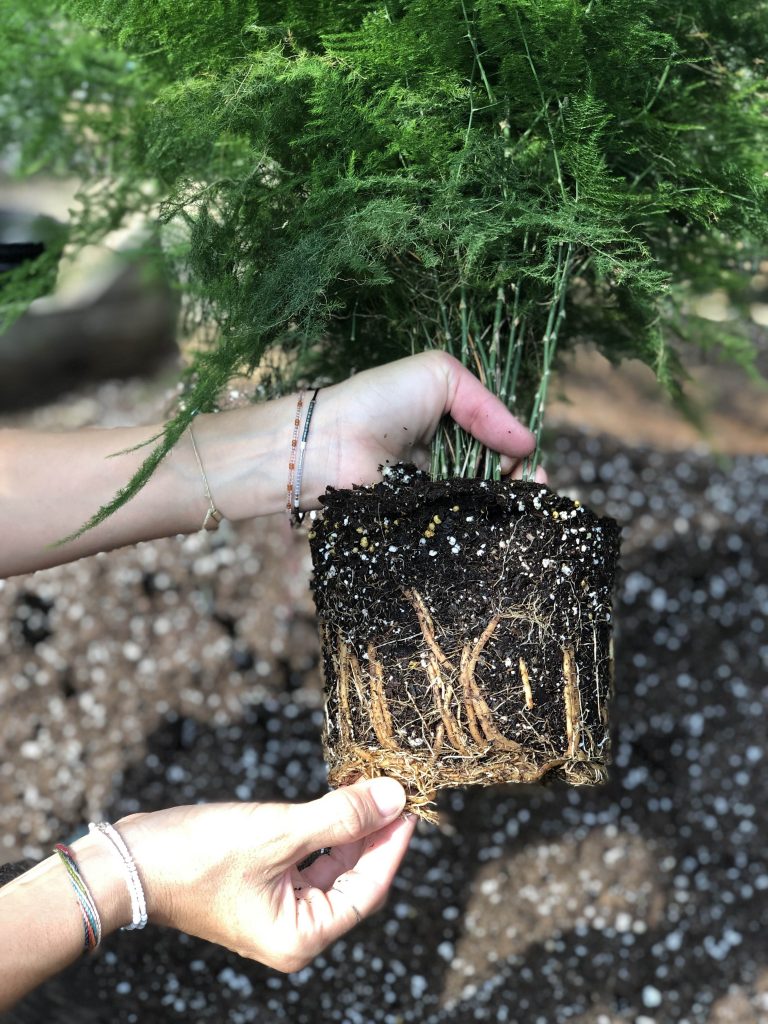
To unpot a plant, turn the plant upside down, supporting the plant by putting your fingers over the soil surface. With your other hand, gently squeeze the plastic container to loosen the roots and soil from pot walls. With the plant still inverted, slowly pull the pot away from the plant, ideally, without disturbing the roots. If the roots are pot bound, loosen them before planting in new container. If the roots are not as developed, as shown below, try to leave them undisturbed.
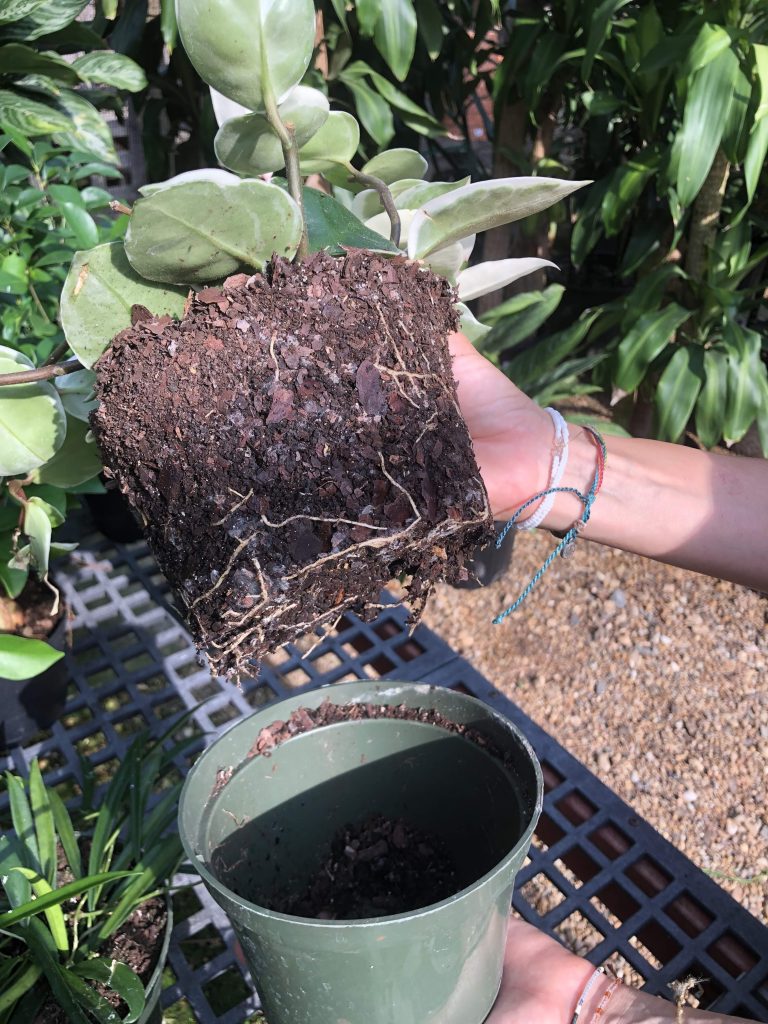
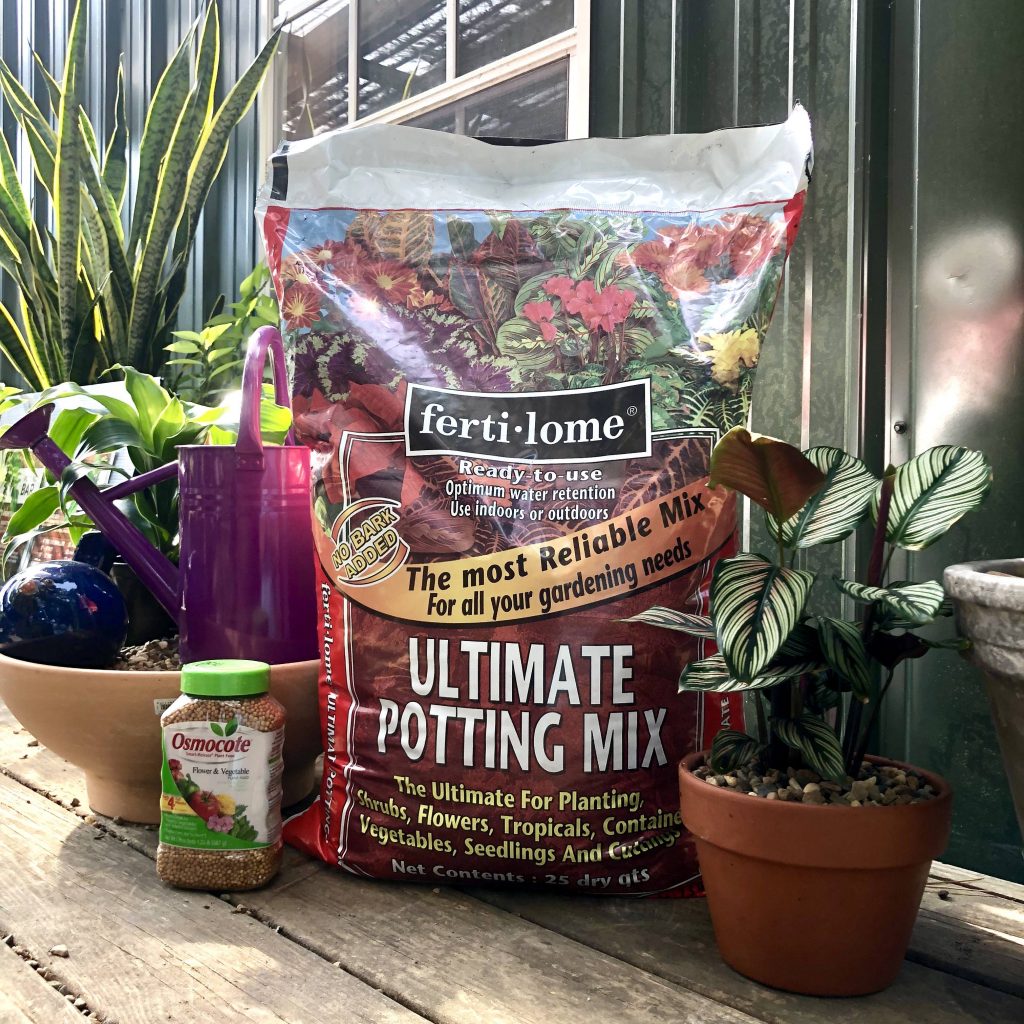
Choose a quality potting mix such as the Ferti-Lome Ultimate Potting Mix or our Good Earth brand Professional Growing Mix. These soil-less mixes consist of sphagnum moss, perlite and other helpful elements. For specialty plants such as orchids, use orchid growing media. For succulents, you can use either our Good Earth soil or Cactus Soil.
When potting up houseplant, we suggest putting enough potting soil in the new container so that when resting on this soil, the existing rootball surface is about 1/2 to one inch below the new container rim. This gives water a place to settle as it is absorbed into the soil. Sprinkle in some Osmocote. Check out the Feeding Your Houseplants post for more feeding info; link is below. Fill in around the sides of the root ball and gently press to eliminate air pockets. Air pockets can allow plant roots to dry out.
Cover the Soil
Top with a decorate covering if desired. Visit Happy Roots Potting Pavilion during your next visit here; we have pea gravel and river rock available as free soil coverings when potting up your houseplants here. In our Gift Shop, we have many more options available for purchase such as white sand, unusual decorative stones and a variety of mosses. These coverings finish off the pot nicely, giving a professional look!
Water and Feed Your New Houseplant
Don’t forget to water and continue to feed your new plant! These are whole other stories; here are links to helpful posts on these topics.
Handy Watering Tools for Houseplants
When to Pot and Repot Houseplants
A good time of year to bump up a houseplant into a larger size pot is spring. Although houseplants do not go dormant, they do grow more with longer days and warmer temperatures. Giving them more room to grow at the beginning of the warm season as opposed to the cooler season when they will be growing less, is a good idea. But if your plants are showing signs of being pot bound, repot or bump them up sooner than later.
We mentioned it a bit above but want to remind you to check your houseplants over well when potting or repotting them. Trim off old or struggling foliage. Look for insect or disease issues and treat them.